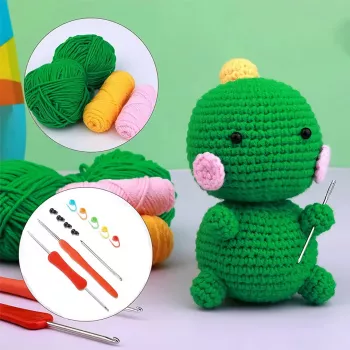
A small dinosaur doll project is an easy way to enjoy a relaxing craft session and end up with a cute ornament or giftable plush. This kit-style project suits beginners who want a guided make and experienced crafters who want a quick, satisfying finish—ideal for weekend crafting, party favors, or a handmade add-on to a present.
What This Kit Helps You Make
This project is all about fast, cheerful results: a tiny dinosaur character that looks great on a shelf, desk, or seasonal display. Because it’s miniature, it’s also easier to finish in a single sitting than larger amigurumi projects.
- A miniature dinosaur doll designed as a decorative ornament or small plush display piece
- A simple, repeatable project that fits into short crafting sessions
- A handmade item that works for birthdays, stocking stuffers, classroom rewards, and craft nights
- A finished result that can be customized with color choices, facial details, and optional embellishments (bows, buttons, mini scarf)
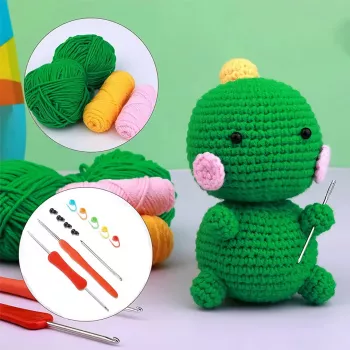
If you’re ready to start with the featured kit, you can find it here: Dinosaur Doll Hand-Knitting Kit – DIY Crochet Ornament Package.
What’s Typically Included (and What to Have Ready)
Most mini crochet kits are designed to keep decision-making low and momentum high. Exact contents can vary by batch, but you can generally expect yarn, basic accessories, and an instruction sheet or pattern. Before you begin, it helps to gather a few small tools so you’re not hunting for them mid-round.
- Common kit components: yarn, basic accessories, and an instruction sheet/pattern (exact contents can vary by batch)
- Helpful extras to have on hand: crochet hook(s) in the recommended size range, small scissors, stitch markers, yarn needle for seaming, and a ruler or tape measure
- Optional but useful: safety eyes (if not included), polyester fiberfill, and a small pouch or box for keeping tiny parts together
- If making as an ornament: ornament loop cord or ribbon, plus a small keyring if turning it into a bag charm
Quick Prep Checklist
| Item |
Purpose |
Nice to Have? |
| Crochet hook (size per pattern) |
Forms stitches consistently |
Essential |
| Stitch markers |
Tracks rounds and increases |
Recommended |
| Yarn needle |
Seams parts and weaves ends |
Essential |
| Fiberfill |
Gives the doll shape |
Essential (if not included) |
| Ribbon/cord loop |
Turns the doll into an ornament |
Optional |
Tip: If the pattern uses standard crochet shorthand, it’s helpful to keep a reference open—like the Craft Yarn Council crochet abbreviations page—so you can move smoothly through the steps.
Skill Level and Time Expectations
Mini plush projects are especially friendly for learning because you repeat the same fundamentals in a small format. That means you get lots of “good practice” without committing to a multi-day make.
- Beginner-friendly when following step-by-step instructions and focusing on consistent tension
- Most mini doll projects rely on basic techniques: chain, single crochet, increases/decreases, and simple assembly
- Time estimate: usually 1–3 hours depending on experience, stitch speed, and detailing
- A great “practice project” for learning neat rounds, even stuffing, and clean finishing
If you’re substituting yarn, match thickness to the pattern’s intent for a tidy, plush texture. The Craft Yarn Council yarn weights system is a reliable guide for comparing yarn labels across brands.
How to Get a Neat, Plush Finish
The difference between “cute” and “store-display cute” is usually finishing. A few small habits—counting, shaping, and careful placement—make mini dolls look polished.
- Keep tension even: tight stitches help prevent stuffing from showing through
- Count stitches each round: use a marker at the start of the round to avoid drifting
- Stuff gradually: add small amounts of fiberfill as you go; overstuffing can stretch stitches
- Shape as you stuff: pinch and roll the body lightly so it forms a smooth silhouette
- Weave in ends securely: run yarn tails through several stitches, then trim close
- Attach details last: eyes, spikes, and any ornament loop look best when positioned after final shaping
For extra durability, take an extra pass when sewing on small pieces (like spikes or tiny arms). Mini parts experience more tugging because they’re easier to grab, especially if the doll is used as a charm.
Customization Ideas for Gifts and Decor
One of the best perks of a small dinosaur doll is how easily you can personalize it. A quick change in color or detail can shift the whole vibe—from nursery-friendly pastels to a bold, playful desk buddy.
Care, Safety, and Display Tips
Featured Kit and More In-Stock Picks
At-a-Glance
FAQ
Is this kit suitable for beginners?
Yes. It’s beginner-friendly for anyone comfortable with basic crochet steps, especially when you follow the included instructions and use a stitch marker to keep rounds aligned.
What tools are needed besides what comes in the package?
You’ll typically need a crochet hook in the size listed in the instructions, small scissors, stitch markers, and a yarn needle for seaming and weaving in ends. Fiberfill or safety eyes may also be needed if they aren’t included in your specific kit batch.
Can the finished dinosaur be used as a Christmas tree ornament or bag charm?
Yes. Add a sturdy ribbon or cord loop for hanging, or attach a small keyring to turn it into a bag charm; either way, reinforce the attachment point with extra stitches and secure knots so it holds up to movement.
Recommended for you







Leave a comment