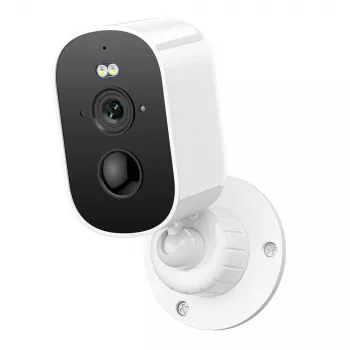
A 4MP solar-powered WiFi camera is built for outdoor spots where running power cables is difficult—driveways, gates, barns, sheds, and backyards. With solar charging and wireless connectivity, the focus shifts from complicated installation to smart placement, stable signal, and settings that capture usable footage day and night.
- Monitoring outlet-free areas: Ideal for gates, detached garages, construction areas, gardens, sheds, and long side yards where adding power is expensive or impractical.
- Lower-maintenance coverage: Solar charging can reduce the hassle of frequent battery swaps, especially for cameras mounted high or far from the house.
- Clearer detail than basic 1080p: 4MP resolution helps when reviewing faces, package activity, and vehicles at closer-to-medium ranges.
- Flexible mounting for real-world properties: Works well on walls, poles, fences, and outbuildings—useful for rentals, temporary projects, or seasonal setups.
Key Features That Matter Day to Day
- Resolution (4MP): A sharper image gives more room to zoom in without turning important details into blur.
- Night visibility: Choose what fits the scene—IR night vision for discreet monitoring, white light for color detail, or a hybrid approach for mixed areas like porches and driveways.
- Motion detection controls: The best alerts come from tuning activity zones and sensitivity, not from maxing everything out. Avoid framing tree branches, flags, and shiny surfaces that can trigger false events.
- Two-way audio: Helpful for deliveries and deterrence, but placement matters. Mounting too close to eaves or open corners can amplify wind noise and reduce clarity.
- Storage options: Think through where clips go—local card storage, app cloud storage, or potential NVR support. Each has different costs, retention limits, and convenience.
Solar + Battery Basics: Placement, Sunlight, and Runtime
- Mount for sun first, then aim the camera: Solar panels need consistent light. Shade from rooflines, trees, and even decorative beams can cut charging much more than expected.
- Use the right angle for the season: A small tilt adjustment can make a big difference across summer vs. winter sun paths. For a quick planning check, regional solar resource tools like NREL solar resource data can help set expectations.
- Reduce “wake-ups” to extend runtime: Fewer triggers and shorter recordings typically stabilize battery life. If a camera is watching a busy street edge, tighter activity zones can be the difference between steady power and constant drain.
- Cold weather considerations: Battery capacity can drop in low temperatures, and wind exposure can make it worse. If possible, avoid putting the battery compartment in a spot that stays cold and shaded all day. Local conditions (temperature, cloud cover, stormy weeks) also matter—resources like NOAA Climate Data Online offer historical context.
WiFi Reliability Outdoors
- Assume the outdoor signal is weaker: Exterior walls, metal siding, stucco, and brick reduce WiFi strength quickly. If live view stutters at the install point, consider moving the router or adding a mesh node closer.
- Line of sight helps more than people expect: A camera mounted on the same side of the home as the router often performs better than one placed “around the corner,” even at the same distance.
- Use a realistic distance and quality setting: Higher resolution can need more bandwidth. A stable connection with consistent clip uploads is more valuable than pushing the maximum setting on a marginal signal.
- For larger properties: A mesh extender is usually a better fix than hoping a weak connection becomes reliable. For general background on Wi-Fi behavior and devices, the FCC consumer guide is a solid reference point.
Recommended Setup Checklist
Quick Settings Guide (Starting Point)
| Goal |
Suggested Setting |
Why It Helps |
| Fewer false alerts |
Lower sensitivity + activity zones |
Reduces triggers from trees, shadows, and traffic |
| Longer battery life |
Shorter clips + cooldown time |
Cuts repeated recording during ongoing motion |
| Clear night footage |
Avoid pointing at lights; set night mode appropriately |
Prevents washout and improves subject detail |
| More usable evidence |
Enable timestamp + highest stable quality |
Makes clips easier to verify and review |
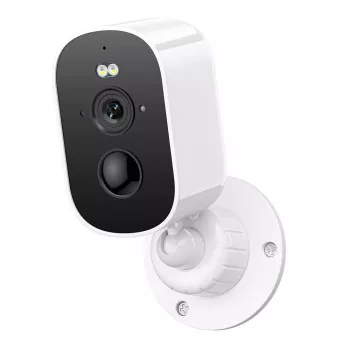
If the goal is clear outdoor coverage without running wires, the 4MP Solar WiFi Camera is a practical option for driveways, gates, backyards, and detached buildings. Before mounting, test WiFi at the exact install spot with a phone—if the signal is weak, shifting the camera a few feet or placing a mesh node closer can make day-to-day performance much more reliable.
At-a-Glance
Related Home Upgrades Worth Considering
Small improvements around entrances can support better nightly visibility and a more secure feel overall. For example, upgrading lighting near a foyer or covered patio can help reduce harsh shadows and make nighttime movement easier to interpret on camera. For indoor entryways and living areas, the Handmade Wabi Sabi Rattan Pendant Light is a distinctive option. And for keeping a bathroom or dressing area more organized, a Hair Dryer Stand with Vertical Storage Rack can help reduce countertop clutter.
FAQ
Does a solar WiFi camera work in winter or cloudy weather?
Yes, but charging is often slower in short daylight or extended cloud cover. Placing the solar panel where it gets the best available sun and reducing unnecessary motion triggers helps maintain battery levels; during long low-light stretches, occasional manual recharging may be needed depending on activity.
How far can a WiFi camera be from the router?
It depends on distance and what the signal must pass through (brick, stucco, metal siding, and multiple walls reduce range). The most reliable approach is to test WiFi strength at the exact mounting point and add a mesh node or extender if the connection is inconsistent.
What’s the best height to install an outdoor camera?
For most homes, about 8–10 ft offers a good balance between tamper resistance and capturing usable face detail. Angle the camera to capture approaching faces and activity paths rather than aiming too steeply downward.
Recommended for you









Leave a comment