Long-Lasting Eyelash Curler with Silicone Pads: A Precision Tool for Comfortable Lift
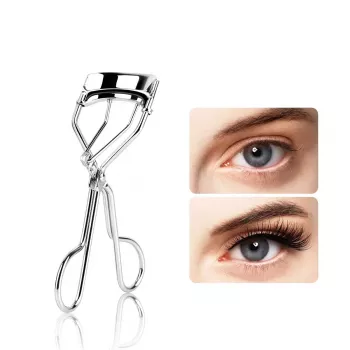
A dependable eyelash curler should lift evenly, feel comfortable right at the lash line, and avoid pinching or crimping. Precision comes down to how the curler fits your eye, how smoothly it closes, and whether the pad cushions lashes instead of leaving sharp bends. Below is a practical guide to how a precision eyelash curler with silicone pads works, what to look for in alignment and tension, and how to get a long-lasting curl while keeping lashes and eyes comfortable.
What Makes a Curler Feel “Precision”
Two curlers can look similar but perform very differently. A “precision” feel usually comes from a few design and build details working together.
- Alignment: The top bar and silicone pad meet evenly across the full width, so lashes curl uniformly from inner to outer corner.
- Edge access: A well-shaped curve helps reach shorter inner-corner lashes without catching skin.
- Controlled tension: Smooth hinge action supports gradual pressure instead of a sudden clamp that can crease lashes.
- Pad shape and softness: Silicone pads cushion lashes and reduce sharp bends that can look like a kink.
If a curler feels “grabby,” pinches, or creates an abrupt angle in the middle of your lashes, it’s often a mix of misalignment plus too-firm pressure at one point along the pad.
Silicone Pads: Comfort, Grip, and Curl Quality
The pad isn’t just a spare part—it’s the contact surface that determines how gentle (or harsh) the curl looks and feels.
- Comfort and grip: Silicone pads provide a slightly tacky surface that helps hold lashes in place while curling.
- Smoother curve: Softer pads can reduce crimping by distributing pressure across more lash surface area.
- Consistency: Fresh pads matter because worn pads can split, harden, or develop grooves that lead to uneven curls.
- Hygiene: Having multiple replacement pads makes it easier to keep results consistent and more hygienic over time.
How Pad Condition Affects Results
| Pad condition |
What you may notice |
What to do |
| New/clean, smooth silicone |
Even lift and less risk of creasing |
Wipe after use; store dry |
| Grooved or dented |
Lines or kinks in lashes; uneven curl |
Replace pad |
| Dry, stiff, or cracked |
Pulling, snagging, or lash stress |
Replace immediately |
| Product buildup (mascara residue) |
Slipping or lash clumping at clamp point |
Clean curler; avoid curling after mascara |
How to Use an Eyelash Curler for a Long-Lasting Curl
A long-lasting curl is usually the result of controlled technique, not maximum force. Think “steady and repeatable,” not “hard squeeze.”
- Start with clean, dry lashes: Curl before applying mascara to avoid sticking and breakage.
- Place at the base: Position close to the roots without pinching skin, then gently pulse pressure rather than clamping once.
- Create a natural arc: For a softer curve, move the curler slightly upward in two steps (base → mid-lash), using lighter pressure each time.
- Hold briefly: Hold each pulse for a few seconds; consistency beats force for a smoother curl.
- Finish with mascara (optional): Apply mascara to set the shape, and comb through if needed for separation.
If your lashes are stubbornly straight, small improvements in placement and pad freshness often make more difference than squeezing harder.
Common Mistakes That Flatten Curls or Stress Lashes
- Curling after mascara: This can cause lashes to stick to the pad, increasing clumping and the risk of snapping.
- Clamping too hard: Excess pressure can create sharp angles and may weaken lashes over time.
- Misalignment at the lash line: If the curler sits slightly off, you may miss inner-corner lashes or curl only the outer half.
- Skipping pad replacement: Old pads can develop dents or grooves that imprint onto lashes.
- Rushing removal: Always open the curler fully before sliding away to prevent tugging.
For eye-area safety and best practices, review guidance from the American Academy of Ophthalmology. For general cosmetics safety considerations, the U.S. Food & Drug Administration is a reliable reference.
Care and Cleaning for Better Performance
Clean tools tend to grip better, curl more evenly, and feel more comfortable at the lash line.
- After each use: Wipe the silicone pad and metal surfaces with a tissue to remove oils.
- Weekly cleaning: Use mild soap and water or a small amount of alcohol on a cotton pad (avoid soaking the silicone for long periods).
- Dry completely: Let all parts air-dry before storing to prevent residue buildup and odor.
- Replace pads as needed: Swap pads when you see grooves, stiffness, cracks, or persistent mascara staining.
A Practical Option with Extra Pads
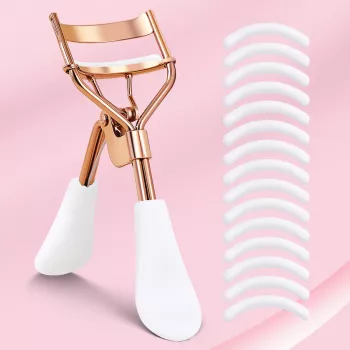
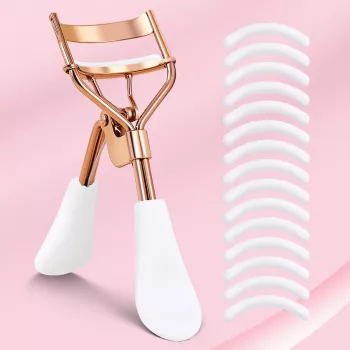
- Long-Lasting Eyelash Curler with 15 Silicone Pads – Precision Curling Tool: designed for controlled curling with replaceable silicone pads for comfort and consistent results.
- Extra pads support routine replacement, which can help maintain an even curl and reduce snagging caused by worn grooves.
- Keep one or two spare pads in a makeup bag so performance stays consistent while traveling.
Other in-stock grooming essentials (optional add-ons)
FAQ
Should lashes be curled before or after mascara?
Curl lashes before mascara, when they’re clean and completely dry. Curling after mascara can make lashes stick to the pad, leading to clumping and a higher risk of breakage.
How often should silicone pads be replaced?
For regular use, many people replace pads every few weeks to a few months depending on wear. Replace immediately if you notice grooves, cracks, stiffness, or slipping during curling.
Why does an eyelash curler pinch or miss the inner corner?
Pinching or missing inner-corner lashes often comes from fit and alignment issues, eye-shape differences, or positioning too close to the skin. Try adjusting the angle, using lighter pulses, and confirming the pad sits flat and centered before you close the curler.
Recommended for you







Leave a comment